ManerLink Implementation
First Steps to Obtain ManerLink
Once you have contacted Maner Costerisan for you copy of ManerLink, we will return to you with information on how to login to our
MSO.ManerWeb.com (mso) website. From there you will be able to retreive all the necessary information needed for your ManerLink installation.
Click here to visit the site: MSO.ManerWeb.Com
We will setup your company and login information within the mso website. After that the first time you attempt your login, you will be prompted
for a email confirmation that will be sent to you with a link in the email. After you confirm your email, you will then be able to navigate
the mso site.
Viewing the MSO Website
Once you have logged into the MSO site and confirmed your email, you will want to navigate to the menu on
the top left and click on Client Info. If you are a Partner logging into the system then you would click on Clients.
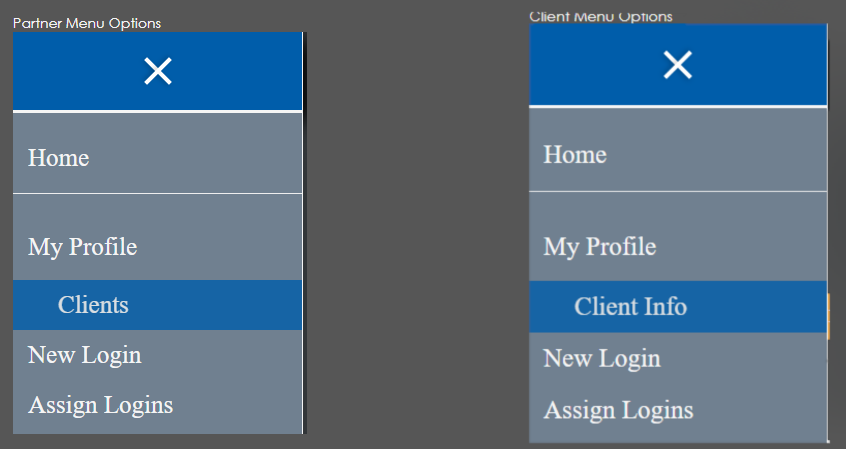
Partners Only - After navigating to the Clients page, you will be able to select which client you want to work with.
Clients Only - Once you select the Client Info button you will be redirected to your client page immediately.
From the Client Information pages you will be able to view many different informative items:
-
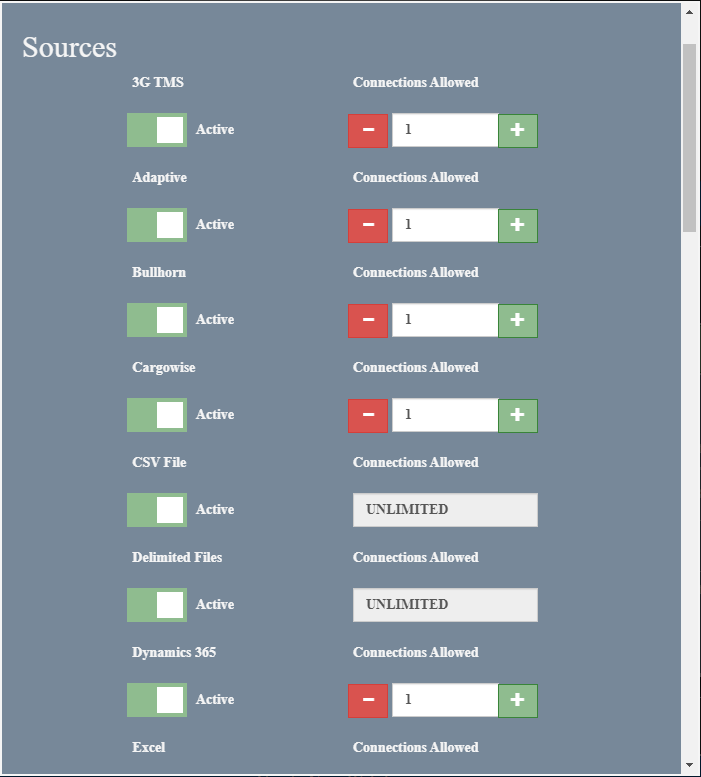
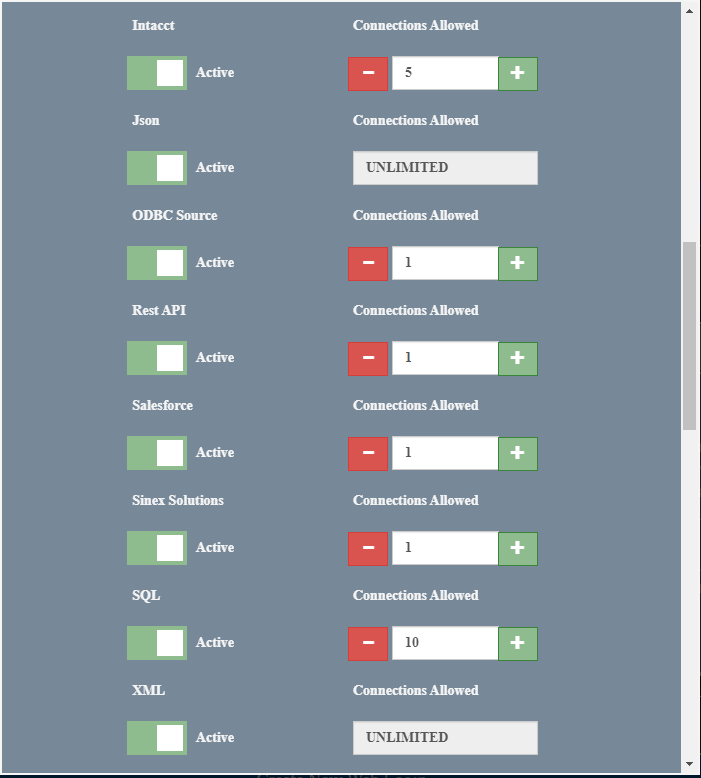
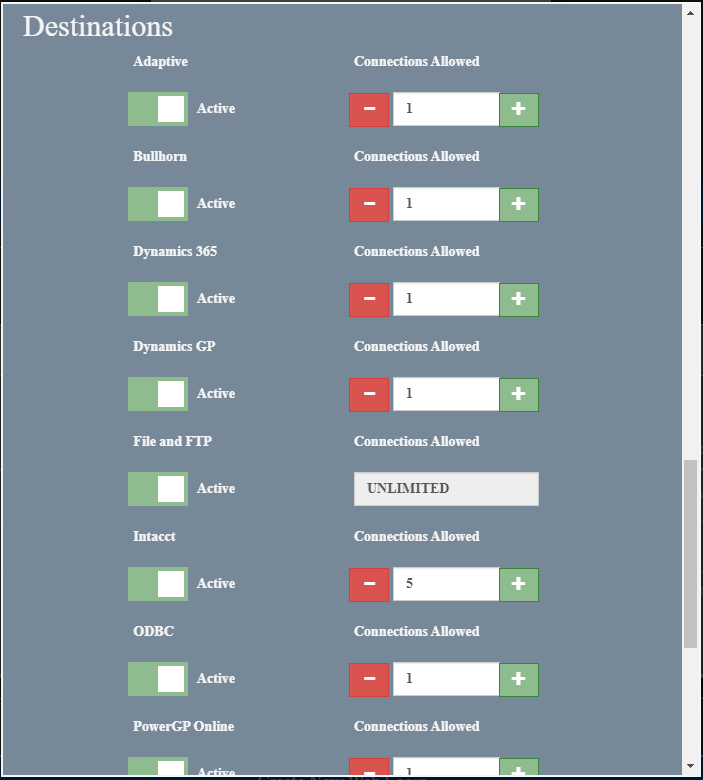
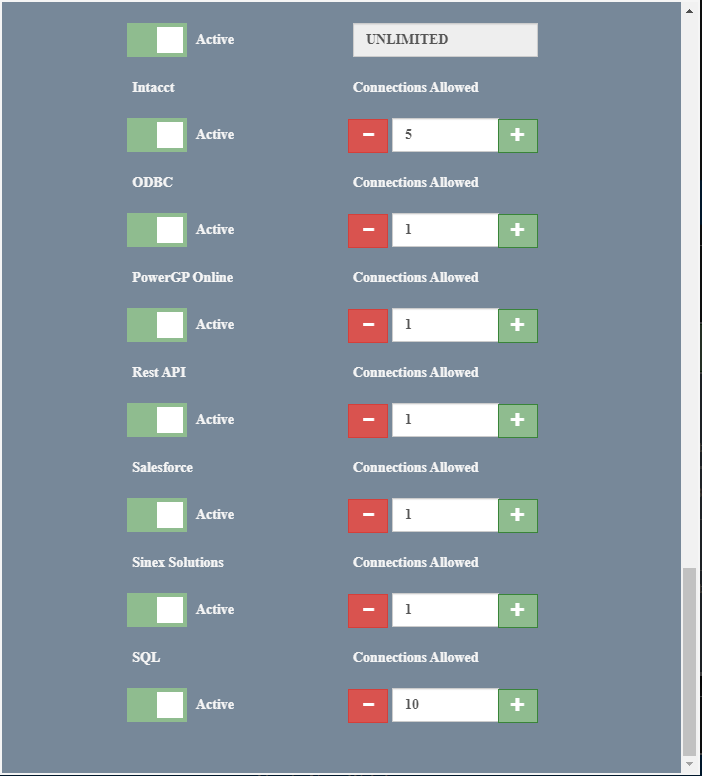
You will be able to see which products you have registered for

-
You will also be able to see the Endpoints assigned to your instance of ManerLink
-
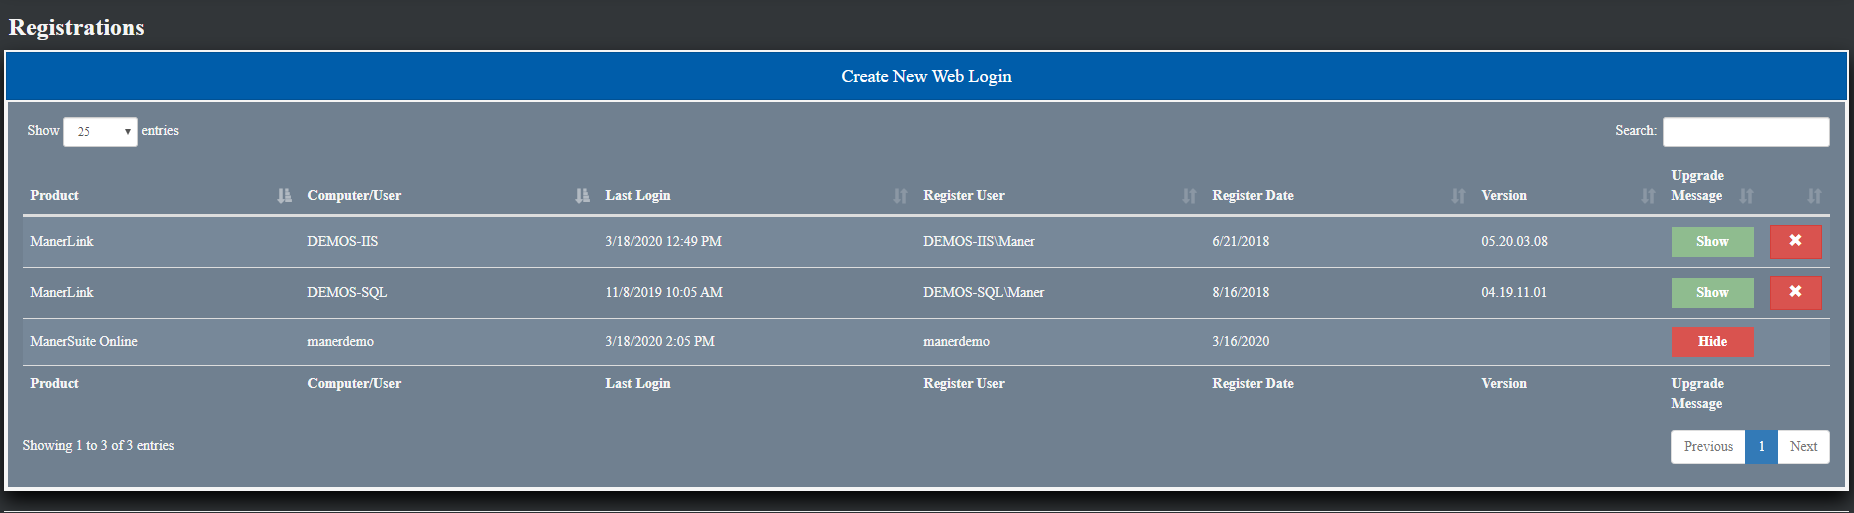
You can also view all of the product Registrations that have been assigned to your companies Products.
From this screen you can choose to remove old or unused Registration for the products. This will be helpful
if you have run out of seats for a product and have a couple registrations that are no longer in use.
-
You can also add new logins to the our suite of websites by clicking the Create New Web Login button.
After you have created them you can assign them either to the mso site or our ManerLink.com site

-
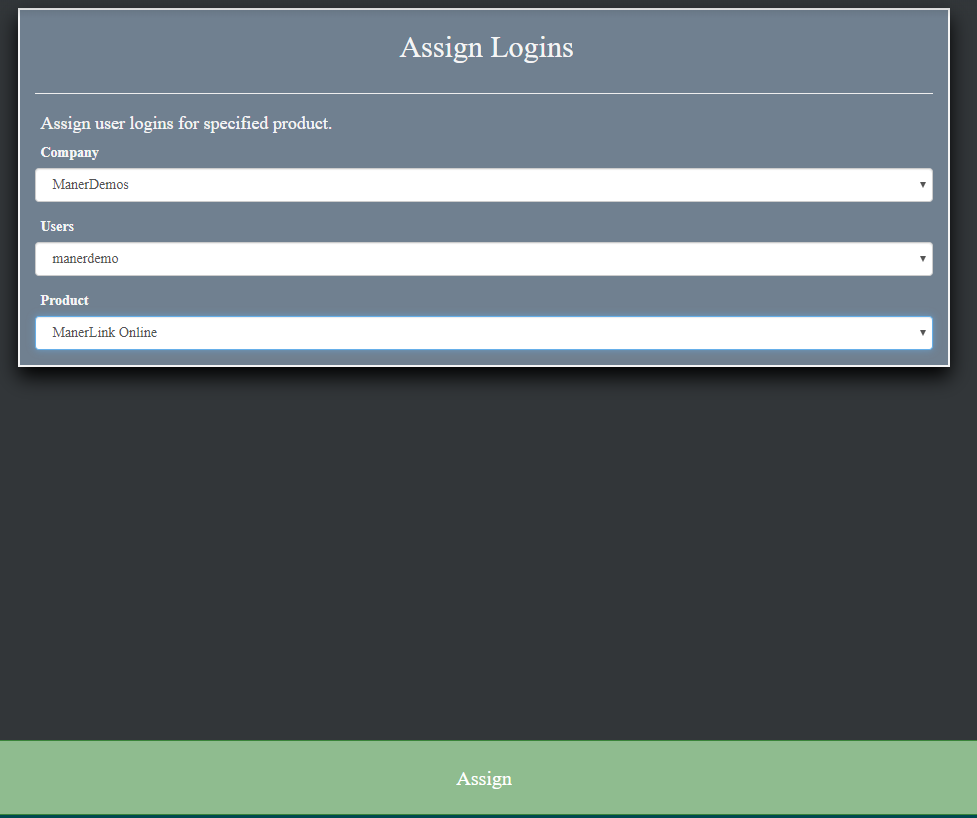
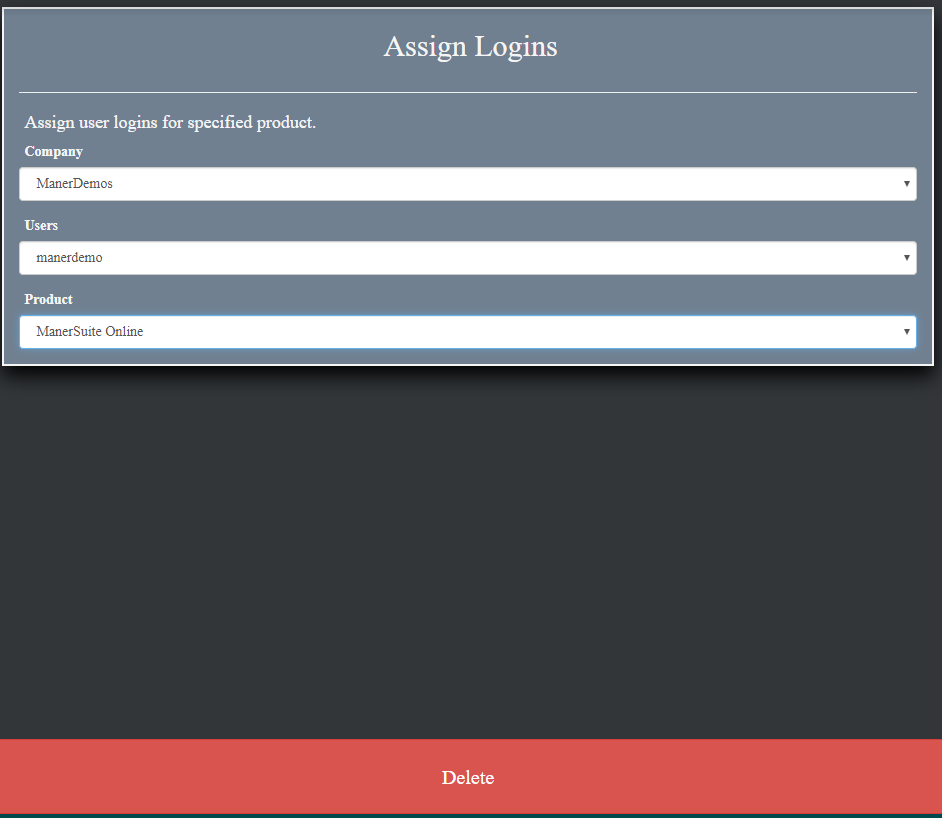
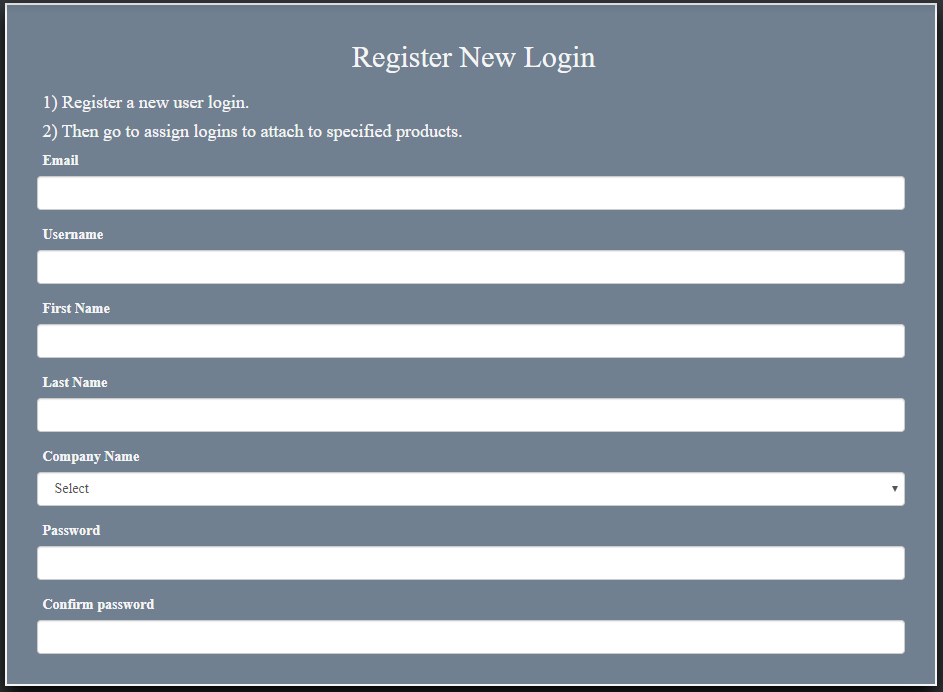
Creating a new web login will bring you to the following page:
-
From that page you can create a new login for your suite of online products, the MSO site as well as the ManerLink Online product.
After you fill in the related fields and create the user, you must go to the Assign Logins
Window. From there you can assign or delete logins from the specified product
-
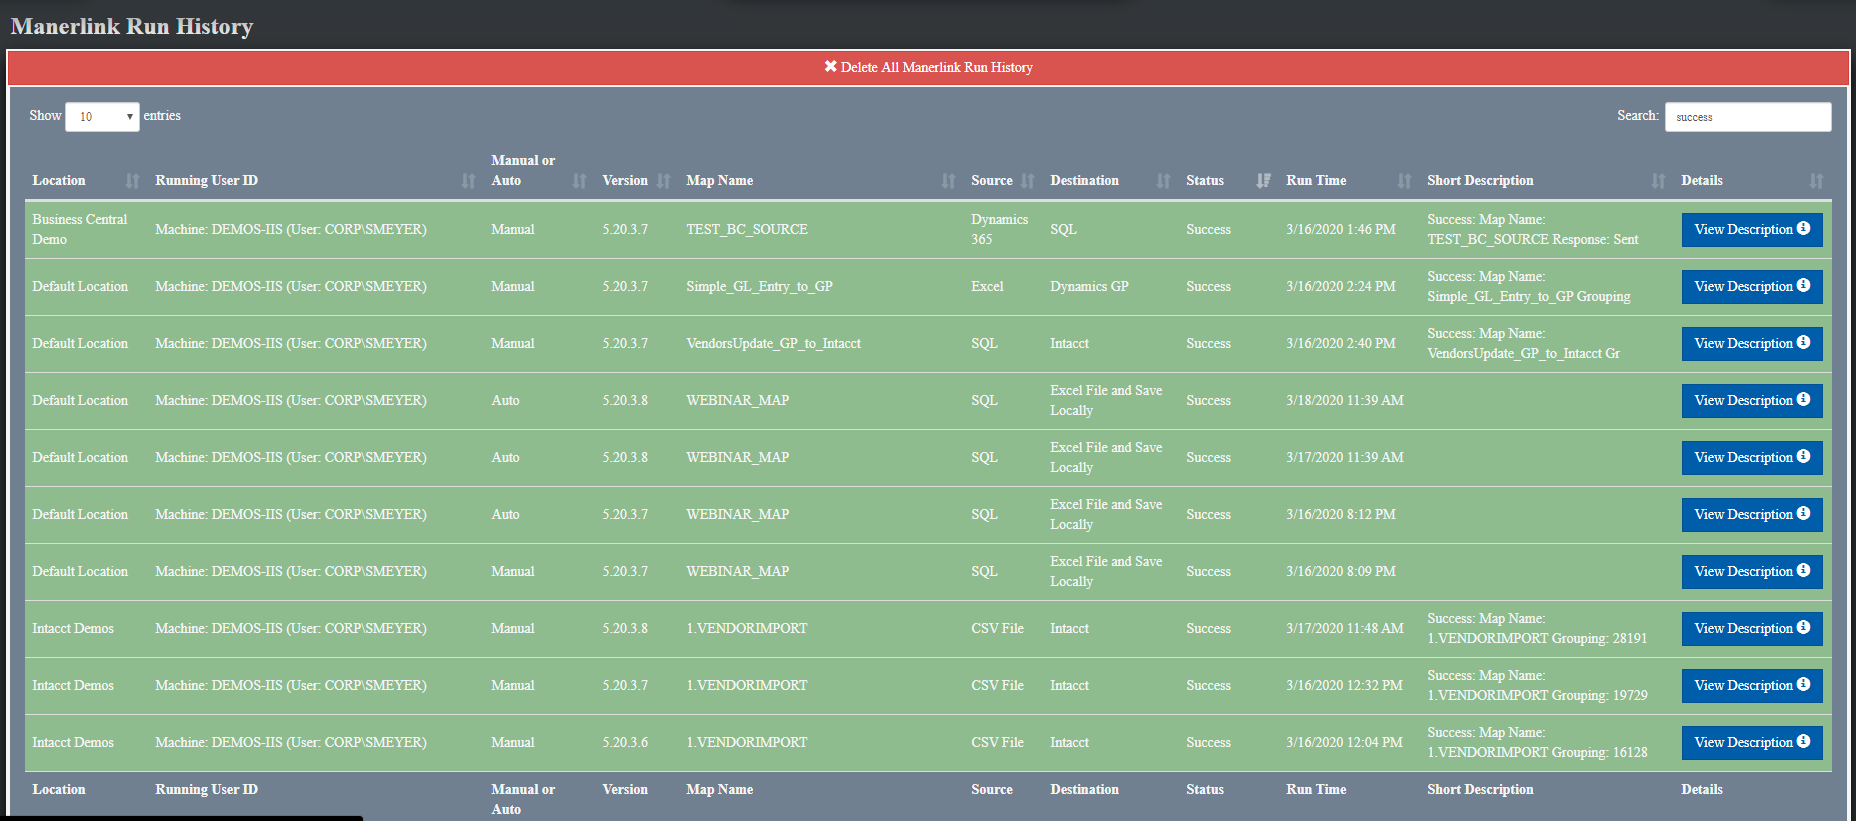
You can also view the ManerLink history of any map. This feature will show you the last 250 run attempts on your registration of ManerLink
Required Information
Information that will be required when launching ManerLink for the first time will be your Short Company Name and your Registration Key.
Both of these information pieces will be found on your clients information main page.
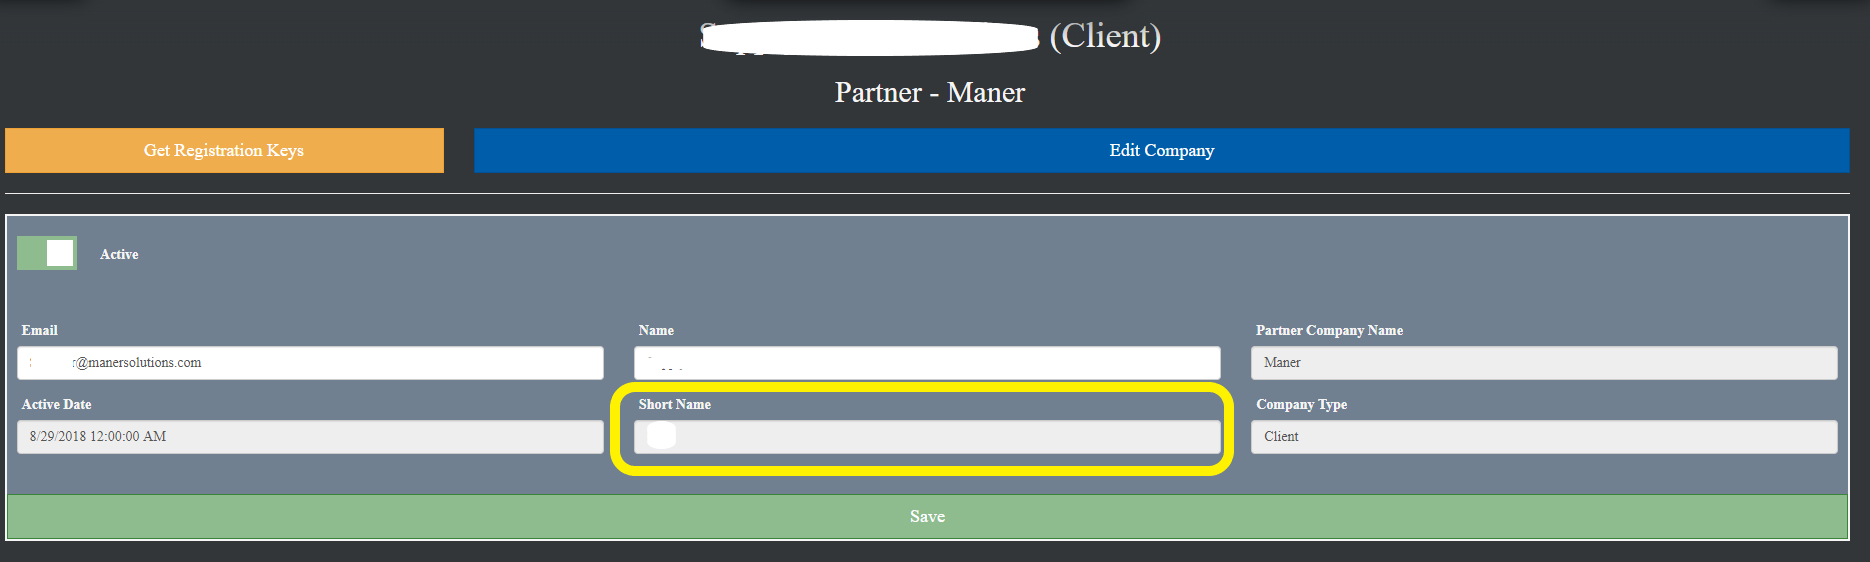
Your Short Company Name can be found by clicking on the Edit Company button on the top of the Client Info page.
From there you should see a Short Name field. This field is your unique company name assigned to you and will be used as part of the registration
for any of your products.
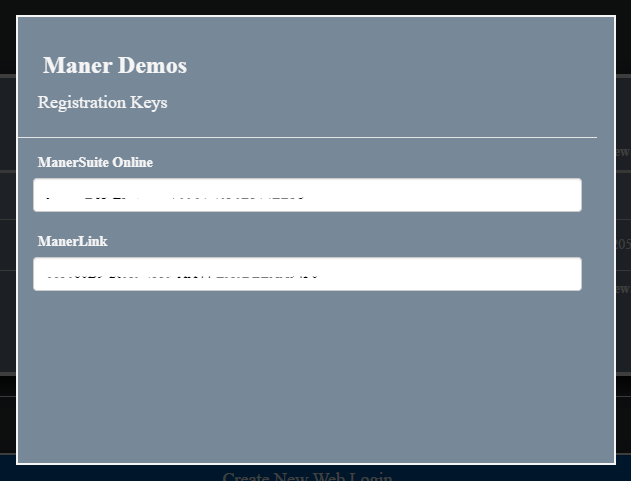
Next your Registration keys are found by clicking on the orange Get Registration Keys button, which is also located on the Client Info page.
There might be more that one key found on this page. Please make sure you select the one that is labeled for ManerLink

Now you should have all of the required information to login to ManerLink for the first time, after installation.
Download and Install
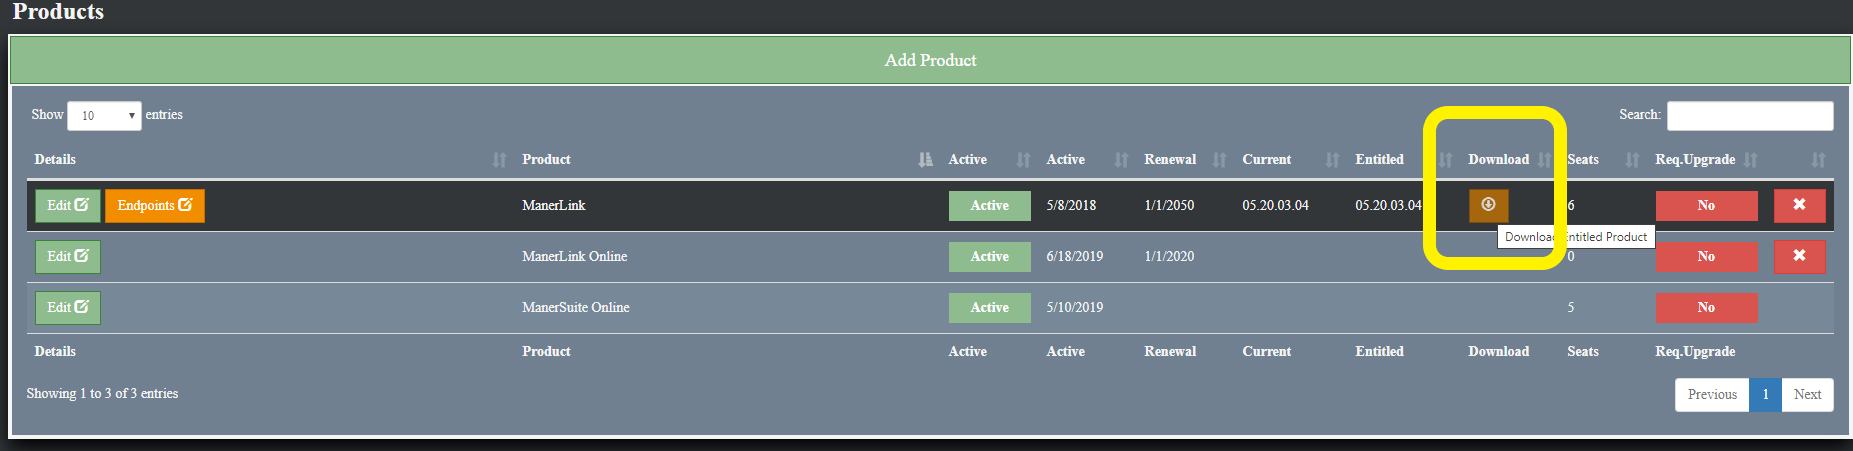
To begin the download process of ManerLink, you must be logged into the mso website and be on the Client Info page.
From there you will click on the orange Download button on the right of the Products table.
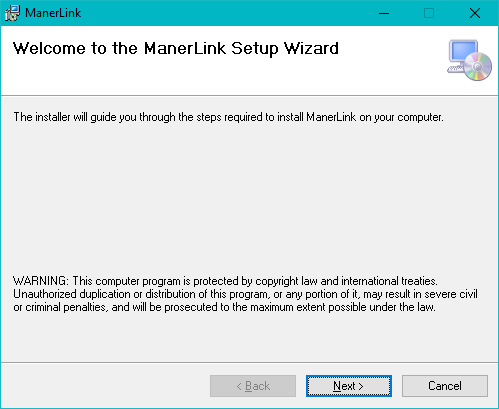
After you have downloaded your company's instance, unzip the folder downloaded and run the Setup.exe file.
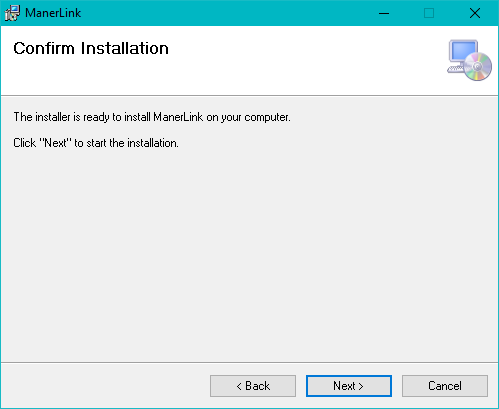
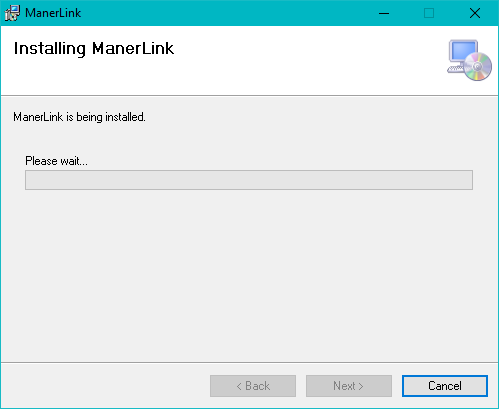
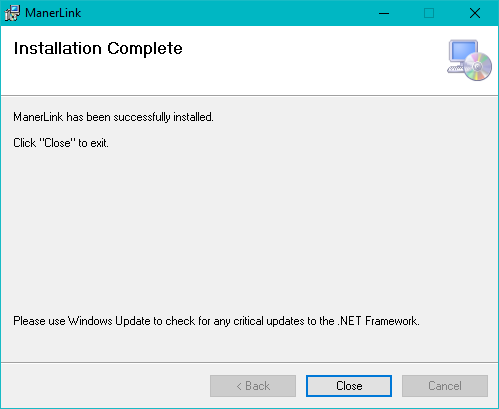
This will now take you through the installation process, which should only take a few minutes.
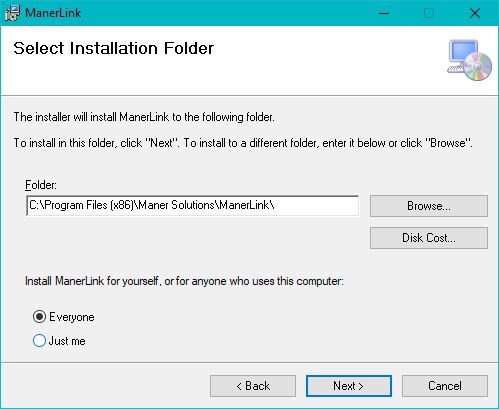
The installation process will now take you through a few steps that let you decide the location of the application
and if you want it accessible to you only or everyone on that computer.
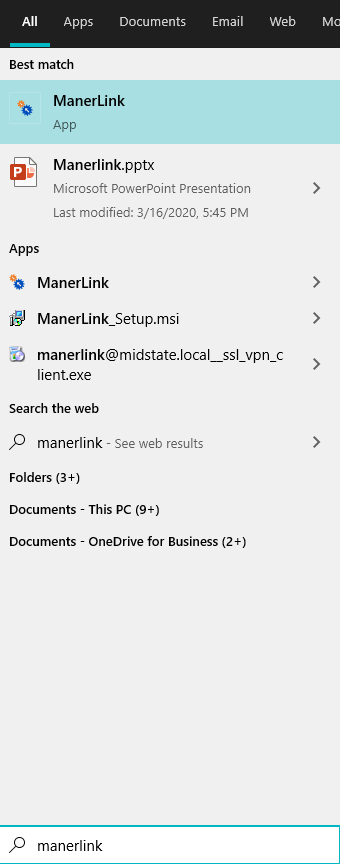
After you finish the installation, you will then be able to search for ManerLink through the built in Windows search functionality.
If you search for "ManerLink" it will pop up as your first option.
First time running and Security Processes
When you open ManerLink on a computer for the first time User, you will need to supply the two
required fields that we mentioned earlier in the Required Information section.
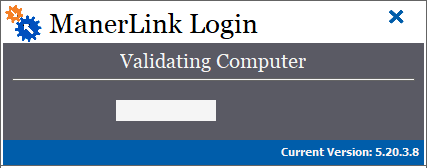
The First window you will see pop open each time you start ManerLink will be the Validation screen.
This screen Validates the current Machine running ManerLink and determines if it is in the list of
Registrations within the MSO site.
If the Machine fails the registration process, you may recieve one of the following messages from the login:
-
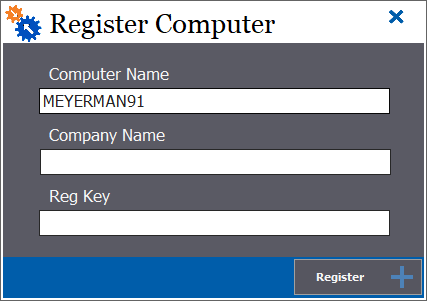
Register Computer: This will require you to input the two required fields (Short Company Name and Registration Key) into the form to continue.
-
-
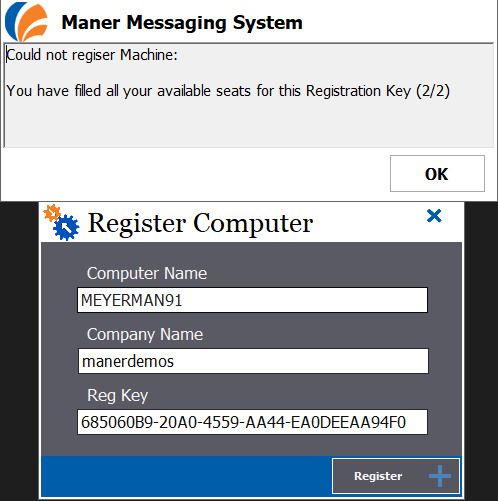
All the Registration Key's seats have been filled: This message will show up if you do not have any more seats left to use within ManerLink.
In order to resolve this issue, you will either need to purchase more Seats, or remove a current registration through
the MSO site under the Client information page.
-
-
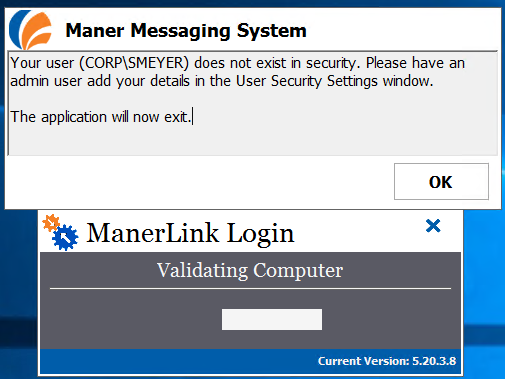
User does not exist in the User Security module within ManerLink: You will see this error message appear if the user is not
the first to login for a company and the user is not setup in the User Security Module.
This error will not occur for the first user to run ManerLink for a company because it will automatically add the first user
to the User Security as an administrator.
-
Setting up Additional Users within User Security:
-
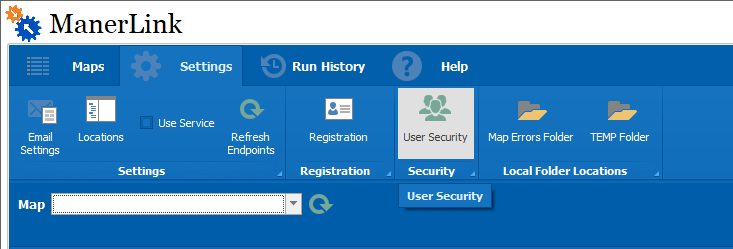
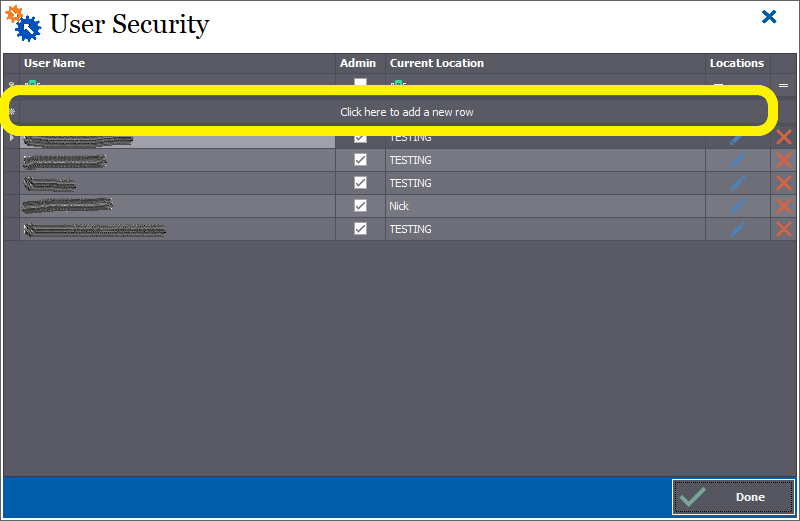
From the Main Form window within ManerLink. Navigate to Settings > User Security to open up the User Security window.
This form is only accessible by Admin users already within the system
-
-
After opening up the user security form, you will be able to add new users based on their Domain user name built into the network.
Click in the highlight row in the picture below, and type in the username on the left and decide if they will be an admin user.
-
If you decide they are not an admin user, you must assign location permissions, as well as map permissions within the location. You can
choose to grant them full access to specific locations if you don't want to specify individually.
-
If you do not receive any error messages after Registering ManerLink, then you are now free to create any Maps you need within the
ManerLink Mapping forms and Main Form.
To view more documentation on ManerLink procedures, Please follow this Link to our ManerLink
Documentation and Help Pages